On this tab, users can create a range of sizes for Styles or Materials based on the various sizes created under the Size tab. Users can also define Size Maps for a Size Range.
Size Ranges can be created as one or two-dimensional. For creating a one-dimensional size range, users must now define a Dimension Type. For a two-dimensional size range, users must define Dimension 1 and Dimension 2 Types which will control selection of sizes and build a size grid once the sizes are selected.
![]() Create
a New Size Range
Create
a New Size Range
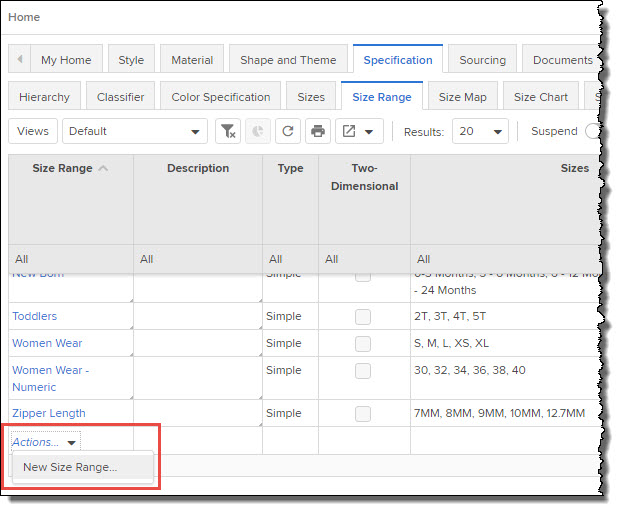
Navigate to Home > Specification > Size Range.
In the Size Range column, mouse-over Actions and select New Size Range....
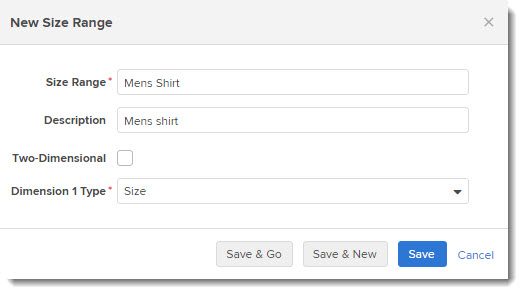
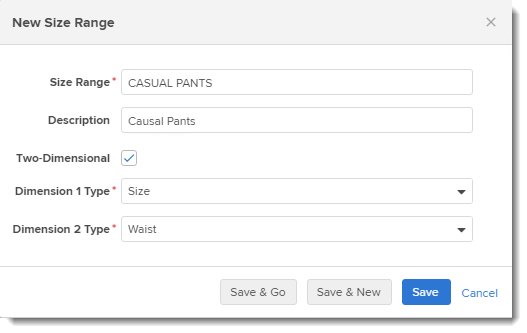
In the New Size Range dialog box, enter the Size Range name and description details. To save the details, click on the Save. The new size range details are created and displayed in the table.
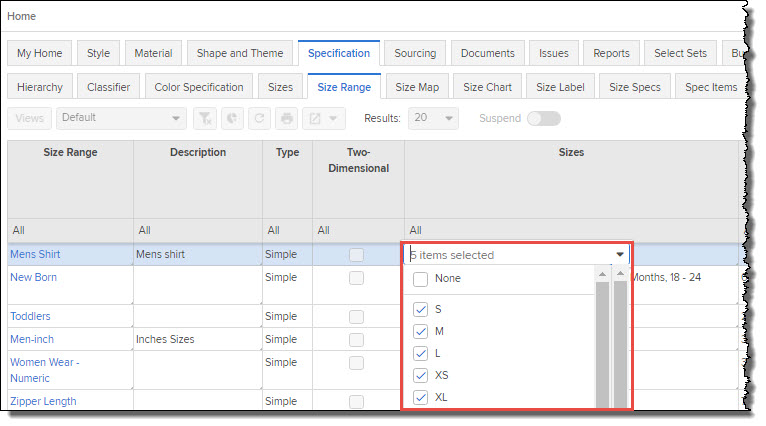
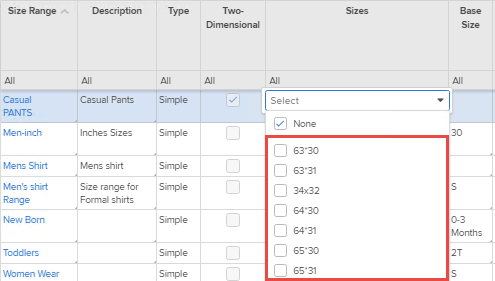
To add various sizes to the range, in the Sizes column, click anywhere within the cell corresponding to the required Size Range and from the drop-down menu select one or more sizes
To define Base Size for the Size Range, click on the Base Size column and select a Size to be assigned as Base Size.
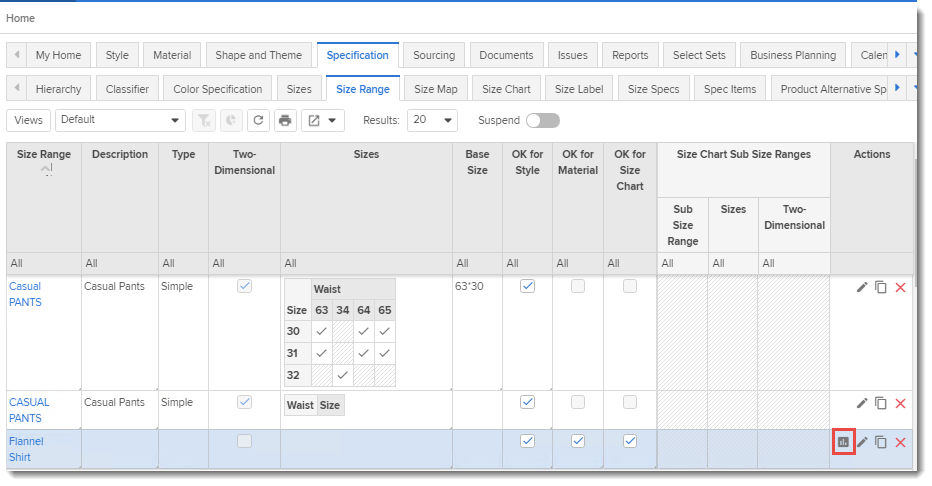
The Select Size Chart Size Ranges icon in the Actions column will no longer be displayed if one or more size ranges are selected from the Sizes column.
The following attributes are displayed in the Default view:
Size Range: All existing size ranges re displayed in this column
Description: A brief description of the item to which the size range pertains
Type: The type of size range
Sizes: One or more sizes allocated for the size range
Base Size: The base size of a particular size range
Actions: This column consists of various icons that allow actions such as Merge color specification, Edit, Delete etc.
![]() Create a New 2-dimensionsal Size Range
Create a New 2-dimensionsal Size Range
Navigate to Specification > Size Range tab.
In the Size Range column, mouse-over Action and select New Size Range..
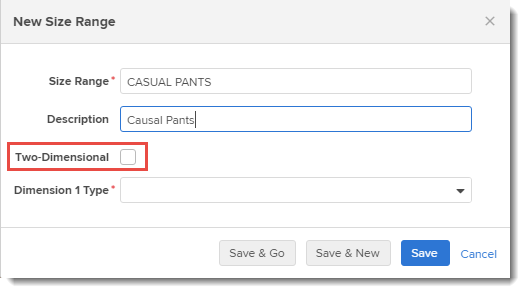
In the New Size dialog, enter a value in the Size Range field.
Select Two-Dimensional check box.
Select details for Dimension 1 and Dimension 2
Click on Save.
To add various sizes to the range, in the Sizes column, click anywhere within the cell corresponding to the required Size Range and from the drop-down menu select one or more sizes.
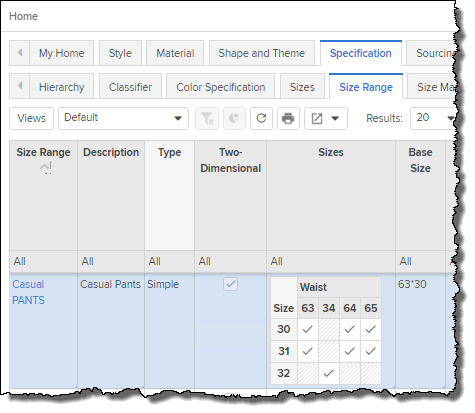
Newly created Size Range will be displayed in the Size Range table.
The OK for Style, OK for Material and OK for Size Chart check boxes are selected
by default. When checked the size range is applicable for Styles, Materials and Size
Charts. When users de-select any of these columns, the Size Range is not available
for selection for that category.
Due to grading logic for the Size Chart, OK for Size Chart will be enabled only if
the base size selected for the size range has a valid value for every existing second
dimension. Materials do not support 2-D sizes and hence OK for Material remains false
and read-only. Composite Size Ranges cannot use two-dimensional size ranges.
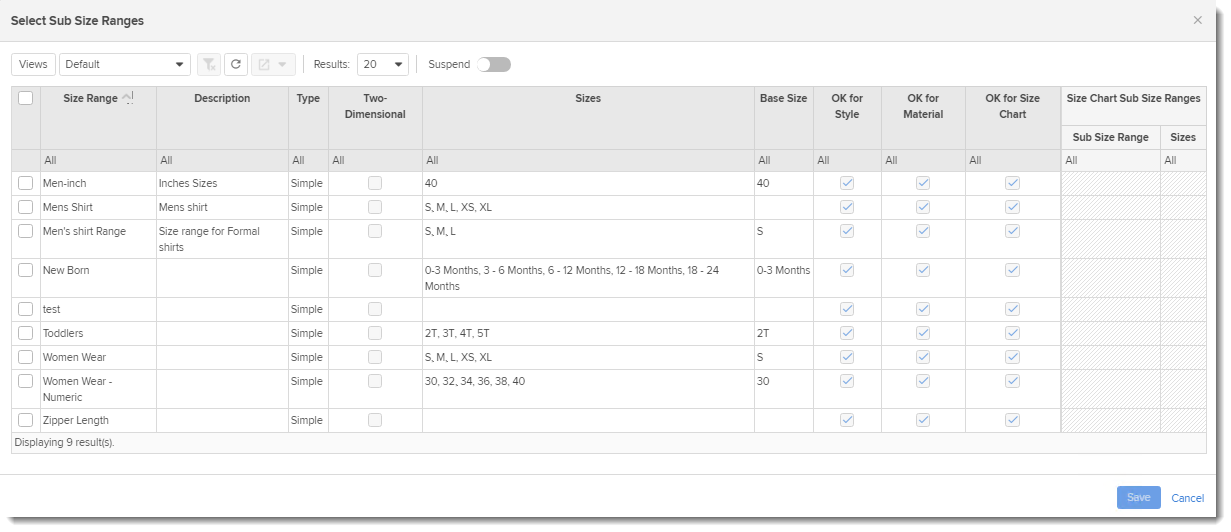
![]() Select
Sub Size Ranges for a new Size Range
Select
Sub Size Ranges for a new Size Range
Navigate to Home > Specification > Size Range tab.
From the Size Range table, in the Actions column, click on Select Sub Size Ranges icon.
In the Select Sub Size Ranges dialog box, select the Size Ranges and click on Save.
At the time of creating a new Size Range, if the sub size ranges are not defined, then the Actions column will display the Select Sub Size Ranges icon corresponding to the new Size Range. Else, the icon will not be displayed.
Click on the Size Range to view its properties.
Pre-Requisite: Define Size. Define Dimension Type 1 and Dimension Type 2 on the Setup > Configuration > Enumerations tab.