There are a large number of standard sizing systems around the world for various garments, such as dresses, tops, skirts, and trousers. Made-to-order garments require measurements to be taken, but these do not need to be converted into national standard form.
Users can create a list of all Sizes to be used in Size Ranges and Size Charts. Users can define the sizes manually or import them from an external source to ensure consistency across systems.
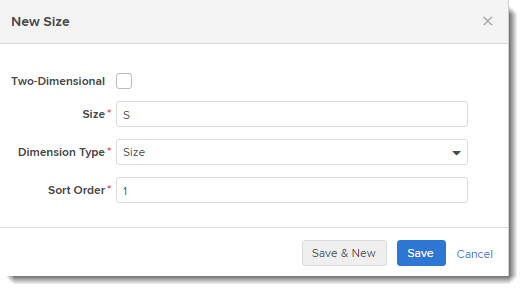
Sizes have now (Centric 8 version 6.0 and above) been enhanced to differentiate between one and two-dimensional sizes. The New Size dialog box now provides a check box (Boolean attribute) called Two-Dimensional that toggles 1-D and 2-D behavior. Sizes have a new enumeration called Dimension Type that must be defined for all sizes.
![]() Create
a New 1-dimensionsal Size
Create
a New 1-dimensionsal Size
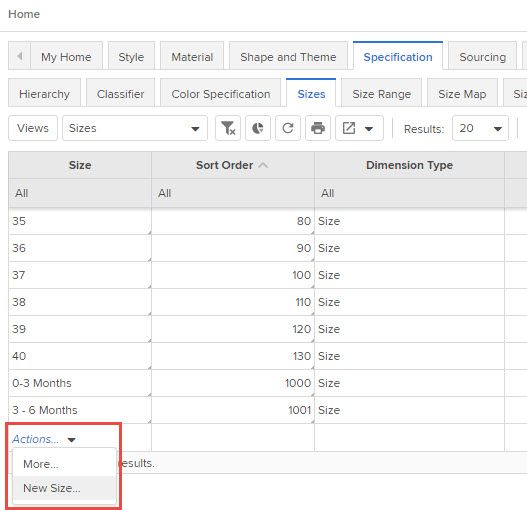
Navigate to Specification > Sizes tab.
In the Size column, mouse-over Actions and select New Size...
The number of results displayed in the table depends on the number specified in the
Results drop-down. If the total number of rows exceed the number specified in the
Results drop-down, then the More... option is displayed on the Actions mouse-over.
To view the rows that are not displayed in the table, click on More... Note that
the More option will not be displayed when "All" has been selected in the Results
drop-down.
NOTE: Sort order Number is an unique value and cannot be added more than once to the size table
The following attributes are displayed in the Default view:
Size: This column lists all the existing Sizes
Localized Name: Displays the local name of the sizes
US Label: Label assigned to the size
Sort Order: This option arranges the sizes in the respective order
Actions: This column provides icons that allow actions such as merge color specification, edit and delete
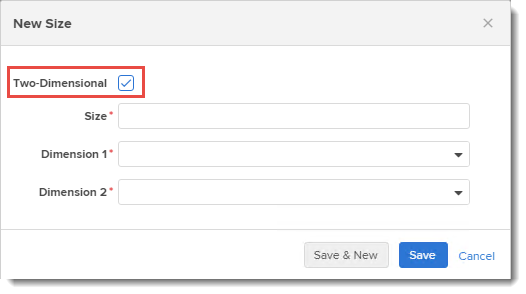
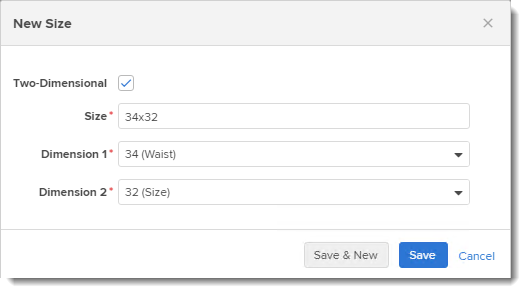
![]() Create a New 2-dimensionsal Size
Create a New 2-dimensionsal Size
Navigate to Specification > Sizes tab.
In the Size column, mouse-over Action and select New Size..
In the New Size dialog, select Two-Dimensional check box.
Enter a value in the Size field.
Select details for Dimension 1 and Dimension 2
Click on Save.
![]() Localize
Size Names
Localize
Size Names
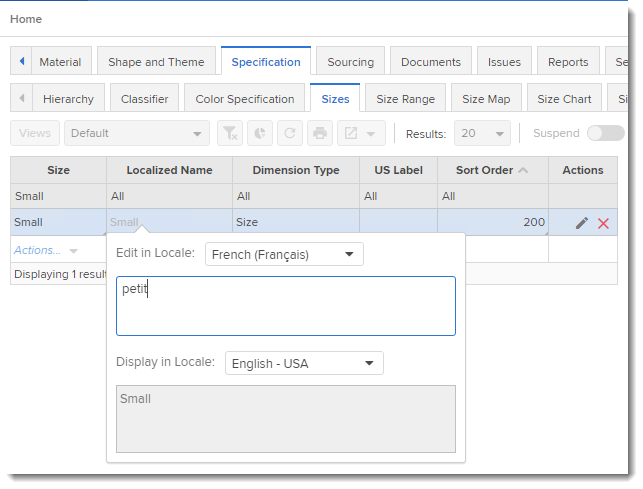
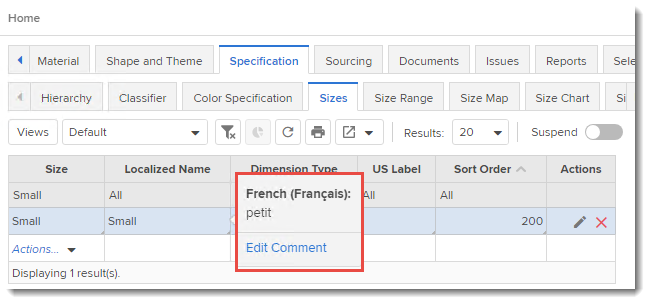
Navigate to Specification > Sizes tab.
To facilitate better understanding in local language, users can localize the Size name.
Click on the Localized Name column to select a local language and enter the Size name in the selected language.
When the local language is English, mouse-over to display the equivalent name in the selected language.
When the local language is the selected language, the Localized Name column displays the size name in the selected language.
Pre-Requisite: The site Administrator must define the Dimension Types on the Setup > Configuration > Enumeration tab.